How to Design a Conveyor System?
Designing a conveyor system starts with the material, not the motor. Product size, weight, surface, temperature, and flow rate shape every major decision. A small carton moves differently from a heavy, abrasive part. The route matters too. Measure the available floor space, note changes in elevation, and mark places where workers need access. A clear layout can reduce transfer points and prevent avoidable jams.
A Designed Conveyor should match the actual duty cycle, not just a target speed on paper. Estimate peak loads, then check belt or roller capacity, drive power, supports, and controls together. Include guarding, emergency stops, cleaning access, and routine inspection points in the design. These details are easier to plan before installation. They are costly to retrofit.
Real sites rarely match drawings perfectly. Dust gathers near transfer points. A floor may slope slightly. A product may arrive less consistently than expected. Allow room for adjustment, and confirm critical assumptions with measurements or a pilot test when practical. Even a neat drawing can be wrong. That is worth remembering.
Reliable design also depends on sound documentation and qualified review. Record operating conditions, component choices, maintenance needs, and known limitations. Check applicable safety requirements with competent professionals before commissioning. A conveyor is not successful merely because it runs. It should move the intended load steadily, protect people nearby, and remain serviceable over time. The best design is often the one that makes problems visible early, though that goal takes careful observation—and sometimes a second look.
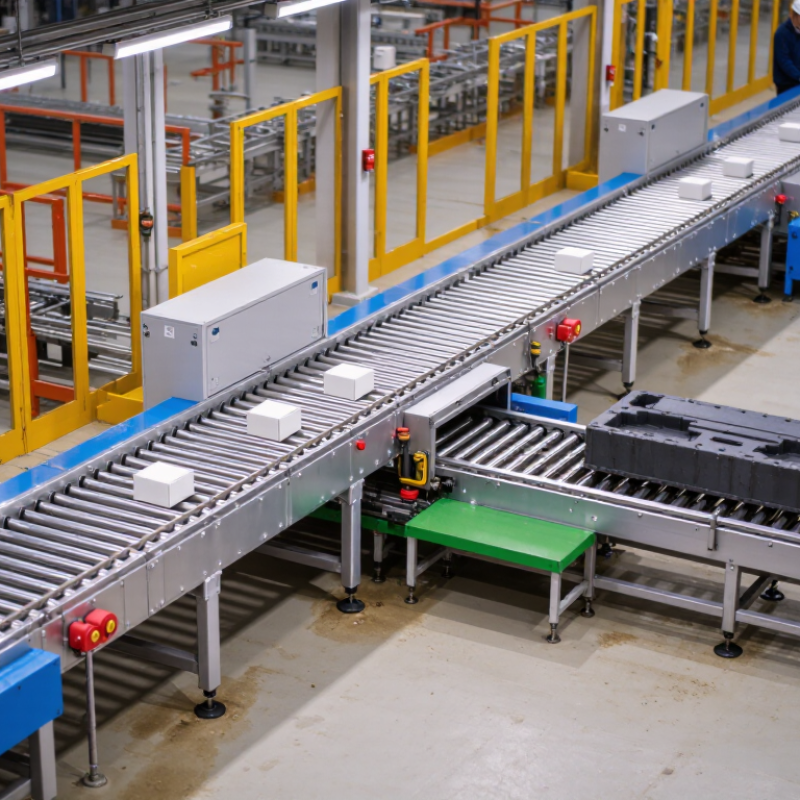
Define the Conveyor System’s Purpose and Operating Requirements
A conveyor system should begin with a clear job description, not a belt choice. Define what moves, how much it weighs, and how many units must arrive each hour. Record the smallest and largest item dimensions, including awkward shapes that may shift during transfer. Map the route, elevation changes, loading points, and discharge locations. Small details matter. A carton that turns slightly can jam at a narrow transfer.
Operating conditions shape the design. Note the expected hours of use, start-stop frequency, temperature, dust, moisture, and cleaning needs. Decide whether products may touch, queue, or require precise spacing. Specify the available floor space and access needed for inspection or repairs. A common oversight is peak demand: a line designed around average output may struggle during busy periods. The first estimates may be imperfect, so check them against actual production records and observe the process where it runs.
Tips: Measure real loads, not just product specifications. Include packaging and occasional overloads. Ask operators where spills, delays, or manual lifts occur. Document those observations, then confirm key assumptions with a small trial or engineering review before finalizing capacity and layout.
Select the Conveyor Type and Establish the System Layout
A conveyor system works best when its type matches the material and the route. Belt conveyors suit cartons, bags, and small parts that need continuous support. Roller conveyors can move rigid boxes across straight sections, but irregular items may snag between rollers. For steep rises, consider a cleated belt or another design that controls product movement. Measure item size, weight, fragility, and expected flow before choosing. A few sample products can reveal problems that a spreadsheet misses.
Tips: Mark the route on a floor plan. Include loading points, workstations, turns, and discharge areas. Leave space for operators to reach controls and clear routine jams. Keep it measurable. A layout that looks neat on paper may create awkward handoffs or tight turns in the building.
Plan the system around the actual path, not just the shortest distance. For example, a line carrying totes from packing to storage may need a buffer zone near the packing station. Add access for cleaning and maintenance, especially around transfer points and drives. Check ceiling height, floor capacity, and nearby walkways before fixing the route. Then review the layout with the people who will use it. Their feedback may force a change, and that is normal. The first plan is rarely perfect.
Calculate Capacity, Speed, Loads, and Power Needs
How to Design a Conveyor System?
Calculate the required capacity before choosing a belt or motor. For bulk materials, estimate mass flow in tonnes per hour, then check whether the belt’s width and loaded cross-section can carry it. Use the material’s measured bulk density where possible; damp gravel can behave differently from dry gravel. Size for peak demand, not just the daily average. A brief surge can cause spillage or overload.
Set belt speed according to the material, transfer points, and desired throughput. Faster is not always better. Estimate conveyor power using the resistance to motion and belt speed; in simple terms, power rises with both load and speed. Include the weight of the belt and idlers, incline, friction, and starting conditions. In practice, these estimates can be messier than a spreadsheet suggests. Recheck assumptions against real operating conditions, and have a qualified engineer review the final drive and structural loads.
Tips: Weigh a representative sample. Measure the actual route, including slopes and bends. Leave room for controlled capacity growth, but avoid oversized motors that waste energy. Record the assumptions; they will need revisiting when the material or duty cycle changes.
How to Design a Conveyor System? - Calculate Capacity, Speed, Loads, and Power Needs
| Example Material |
Belt Width (mm) |
Load Cross-Section Area (m²) |
Bulk Density (t/m³) |
Belt Speed (m/s) |
Calculated Capacity (t/h) |
Material Load (kg/m) |
Conveyor Length (m) |
Vertical Lift (m) |
Estimated Total Running Resistance (kN) |
Estimated Absorbed Power (kW) |
Illustrative Motor Rating (kW) |
| Dry sand |
500 |
0.035 |
1.60 |
1.00 |
202 |
56.0 |
30 |
4 |
3.5 |
3.5 |
5.5 |
| Crushed gravel |
650 |
0.055 |
1.70 |
1.25 |
421 |
93.5 |
45 |
8 |
11.0 |
13.8 |
22 |
| Wheat grain |
450 |
0.025 |
0.75 |
1.50 |
101 |
18.8 |
20 |
2 |
1.2 |
1.8 |
3 |
| Crushed limestone |
800 |
0.075 |
1.50 |
1.60 |
648 |
112.5 |
60 |
10 |
16.0 |
25.6 |
37 |
Calculation notes: Capacity = 3,600 × load cross-section area × belt speed × bulk density. Material load = capacity ÷ (3.6 × belt speed). Estimated absorbed power = total running resistance × belt speed. The illustrative motor rating allows for 90% drive efficiency and a 1.25 service factor, then rounds up to a common motor size. Running resistance values are preliminary assumptions that include lift and conveyor resistance; actual values depend on belt, idlers, loading, alignment, and operating conditions. Verify loading geometry, applicable design standards, starting conditions, and power requirements before final equipment selection.
Choose Components, Materials, and Safety Features
How to Design a Conveyor System?
Choose components, materials, and safety features around the product and the working environment. Start with the load: note its weight, dimensions, shape, and whether it arrives hot, wet, or dusty. A small parcel may suit a belt conveyor, while heavy cartons may need rollers and a stronger frame. Select belt or roller materials that tolerate cleaning agents and expected wear. Dust changes everything. A slippery product can shift at transfer points, so test its movement before fixing the layout. A design that looks tidy on paper may still need adjustment on the floor.
Choose the motor and drive for the required speed and load, not just the average operating conditions. Include the weight of items that may accumulate during a stoppage. Position transfer points to reduce gaps and sharp drops; even a short fall can damage fragile goods. Guard belts, chains, and rollers where clothing or fingers could become trapped. Place accessible emergency stops along the line, and make sure workers can reach them without crossing moving equipment. Small details matter. Review cleaning access and maintenance clearance, too. These are easy to overlook when space is tight.
Tips: Mark pinch points on a simple layout before installation. Test the conveyor empty, then with representative loads. Listen for unusual noise and watch for drifting belts. If a component needs frequent adjustment, revisit the design rather than treating it as normal.
Integrate Controls, Installation, and Maintenance Plans
A conveyor system is only as dependable as its controls, installation, and maintenance plan. Map each stop, sensor, and transfer point before selecting control hardware. For example, a photoelectric sensor near a merge can prevent cartons from colliding, while a clearly marked emergency-stop zone helps workers respond quickly. The U.S. Bureau of Labor Statistics recorded 2.6 million nonfatal workplace injury and illness cases in private industry in 2023. That figure is not conveyor-specific, but it underlines why guarding, safe access, and tested stopping functions belong in the design—not as later additions. Small details matter.
During installation, verify belt tracking, frame alignment, cable routing, and sensor positions under realistic operating conditions. Test it loaded. A system that runs smoothly without product may behave differently when uneven cartons arrive in a rush. Commissioning should document control settings, fault messages, and safe restart procedures. The BLS reported 5,283 fatal work injuries across U.S. workplaces in 2023; this broad figure cannot predict conveyor risk, but it reinforces the need for deliberate safety checks. Maintenance plans should name inspection intervals, responsible staff, and lockout steps. Keep access clear around motors and tensioners, and record recurring faults rather than repeatedly resetting them. One imperfect assumption is common: a calendar-based service schedule may miss wear caused by dust, washdown, or heavy loading. Use inspection findings to adjust the plan.